nuffnang code

Thursday, March 12, 2015

My Budget Travel Series: Hong Kong (Part 1)

   It has been 2 weeks and I am still missing the bright lights, landscaped gardens, architectural wonders, dim sum, milk tea, and the awesome transportation system of Hong Kong.

   It is such a fast paced city, where mostly everything (from eating to shopping) is done briskly but efficiently. It is highly urbanized; but the rich culture of the fragrant harbor manages to seep through the island's surface. Sky scrapers coexist seamlessly with zen gardens and old temples; and street vendors hawking everything from souvenir items, techie accessories, to fried food can be easily found near huge shopping complexes. And speaking of shopping, there is something for everyone here- there are the street markets dedicated to ladies' fashion, boutiques selling apparel by local talents, and avenues with rows of luxury stores. And with a dizzying array of cuisine to suit all palates, one could never go hungry after long hours of shopping and exploring.


Hong Kong's famous harbor on a foggy day 

The egg-shaped Hong Kong Space Museum


The Hong Kong Observation Wheel in Central

Western Market in Central, the oldest surviving market in Sheung Wan

   With so many things to do, stuff to eat, and places to explore, it can all seem chaotic at first. But once you take it all in that's when you realize that this is exactly part of the allure of Hong Kong. Some friends have been asking about my itinerary for this trip and I would be very glad to share it here with you. 

   I came with a few goals: to learn, to experience, and most of all, to relax! I think vacations are pretty much useless if I just end up tired and broke haha.

   I'm breaking down this post into several parts, as this was a 4 days and 4 nights trip. I wanted to visit more places and experience activities that were uniquely Hong Kong without draining my bank account. So that meant more parks and temples, and less shopping malls. I didn't exactly have a day to day itinerary, I just listed down what I wanted to see and do and came up with a masterlist, I spent a little time reading up on HK (on the internet and a Lonely Planet guide book) plus scouring IG and Pinterest for posts by locals and narrowed it down to these:

Places To Visit:

1. Man Mo Temple (Sheung Wan)
2. Chi Lin Nunnery and Nan Lian Garden (Diamond Hill)
3. Tsim Sha Tsui Promenade
4. Apliu Street Market (Sham Shui Po)
5. Shek Kip Mei Garden Hill
6. Temple Street Market and Sneaker Street (Mong Kok)
7. Cat Street/Antique Street (on Upper Lascar Row)
8. Chungking Mansions (TST)
9. Disneyland
10. Any park/museum we'll accidentally stumble upon (which happened to be Kowloon Park and Heritage 1881, respectively)


Kowloon Park

Fa Yuen Street aka Sport Shoes Street or Sneaker Street (Mong Kok)


Enjoying a little peace and quiet with this breathtaking city view on top of Shek Kip Mei Garden Hill

To Do:

1. Ride the Star ferry at night (TST-Central and vice versa)
2. Ride the tram (Central)
3. Get an octopus card
4. Eat at a dai pai dong (outdoor, open-air food stalls)
5. Have HK-style breakfast at a cha chaan teng (tea restaurants serving affordable Hong Kong and Western style fare)
6. Eat Indian food at Chungking Mansions


Riding the tram through Central

 Beef balls at Haiphong Road Food Market

Fried snacks at a street food stall in Mong Kok


Save some for dim sum!

What to expect:

1. Weather:

   Hong Kong has 4 seasons:
  • Cooler winter months are from December to February
  • Spring is from March to May, with temperatures ranging from  21-24°C   
  • The hot, humid months are from June to September
  • Autumn is from November to December.
  • *Rainfalls (light to heavy) tend to occur all year round
 #ootd! Packed space-saving skirts, tights, and tops for easy mixing and matching. Weather was quite unpredictable, glad I was able to pack light clothing for higher temps

2. Electrical Outlets:

   Bring a travel adapter for your electronics, because not all hostels provide this. However, if you forgot to bring one, you can purchase an adapter at street markets for about HKD 10 up. Their outlets look like this:

Type G outlet

3.Currency:
  • Hong Kong dollars- preferably enough for the whole trip
  • Credit cards are also widely accepted (even at convenience stores)
  • Octopus Card- it is a contactless, stored-value smart card. It can be used to make electronic payments in many establishments and is the widely used payment system in all types of public transport in Hong Kong (MTR, buses, trams, the Star Ferry).This is very helpful especially if you stay there for several days or plan on taking public transportation a lot.  This is such a time and stress-saver haha. Octopus cards are available at all MTR stations and at the airport customer service.
My on-loan Octopus card

4. Mobile Networks:

   Stay connected without having to pay exorbitant roaming rates by purchasing a local prepaid SIM card, available at 7/11 stores. We got a China Mobile Sim (HKD 88) with 3 days unlimited data use.

5. Navigate:

  •    For the techie: Google Maps to the rescue! Try saving offline maps or screenshots of the locations you're visiting, and if it's possible, Chinese versions of it too. There is also an app called MTR Mobile which makes it easy to figure out navigating HK by MTR.
  •    For the traditional: if old-school maps are more of your thing, there are maps provided at the airport so don't forget to take one upon arrival. It's very detailed, down to the streets, and there is an MTR and bus guide on it too.
  •    Lost?- We got lost several times despite having both Google Maps and the old school map, and we were fortunate enough to come upon people who were kind enough to help us. This is also where Chinese versions of the maps come in handy, because not everyone can understand English.


   Hope this little overview was helpful enough. Are you planning to go to Hong Kong anytime soon? Stay tuned for the next parts of this series :D Specific IT, directions, and more coming up :)


Saturday, January 31, 2015

Recipes: Pan Fried Steak for beginners


My dad and I practically have a similar palate when it comes to food, and one of our favorites are juicy, beefy, medium rare steaks! We rarely eat out anymore (saves us a lot of money, plus we know what's going in our food) and recreating our favorite restaurant dishes at home has been my latest hobby. This one is surprisingly easy to prepare, the seasoning is really basic and the cooking technique I chose, pan-frying, is easy for anyone to do as well. What is crucial here is the heat of the skillet and timing in order to get that perfect sear on the outside, and all that pinkish juicy goodness on the inside.

You will need:


  • Frying pan (preferably not the non-stick type)
  • Tongs
  • Timer


  • Meat of your choice (I used US Angus Beef Rib Eye and Australian round steaks)
  • Rock Salt
  • Black Pepper
  • Olive Oil
  • Butter


Prep:

1. Thaw the meat and bring to room temperature. Make sure there is no ice left and drain excess water from the meat
2. Season moderately with rock salt and pepper on both sides
3. Put a teaspoon of olive oil on each cut

US Angus Rib Eye

Australian Round Steaks

Cook:

4. Heat the pan and make sure it is very hot before cooking the steak. To check the temp, put in a few drops of water into the pan. If the water will roll around the pan looking like little solid beads, you've reached the desired temperature. Discard water after testing.
5. Lower the temperature just a little bit, then melt a slice of butter to the pan
6. Put the meat in the pan using the tongs, cook each side for 1 minute (this is for thin cuts of meat, medium rare to medium well. Thicker cuts of meat need longer cooking times, another timing factor is also  how well done you want your steak to be)


Heat test for the pan


Serve:

1. Let sit for at least 5 minutes so the juices can run through the fibers and lock in the flavor. Serve with your favorite sides, gravy or steak sauce, and maybe some wine. Enjoy your home-made steak! :)


Tips and Tricks:

1. Do not marinate the meat, leaving salt on it can absorb moisture and make your steak dry/tough
2. While cooking, do not keep flipping it from one side to the other, as frequent flipping can make the meat tough
3. When it comes to steaks, it is better to undercook than to overcook, as this allows room for improvement. After removing the steak from the pan, you can slice it and check if it's done just the way you like. If it's a bit too bloody for your liking, you can always return it to the pan for some extra cooking.

Have you ever tried cooking your own steaks at home? What cuts and cooking technique did you use? Share your cooking experiences in the comments section! :)


I'm Back!

Hi guys! I just looked back at my old posts and I realized just how fast time flies! This is probably the longest time I have been on a writing hiatus. My usual excuses- I was too busy, I had better things to do, I needed a simpler camera for photos (a point and shoot, because photos from a DSLR are too much of a hassle to upload and edit, plus it's too big to lug around haha), and when I finally get enough time to sit in front of the PC, I had another excuse- I wasn't inspired. 

This time though, I am committed to carving out a little time in my schedule to do what I love most- writing about the things and activities that interest me, in the hopes that I would be able to reach out to other people as well. I love Instagram and I've been posting pictures of my #fotds (face of the day) and the meals that I prepare and I usually get queries on how to do them, so here it is! :)

Facebook and Instagram are awesome, but nothing really beats being able to detail makeup techniques and food recipes on a blog.

I started blogging when I was in high school, and it was full of (super embarrassing) angst-y, typical teenager stuff; during my college years to early career years it was purely beauty and makeup blogging. Over 10 years my interests have evolved and I hope that you, dear readers (especially those my age) will be able to relate with me on the new topics I will be covering. 

Thank you to everyone who has followed The Kikay Chronicles in the past, hope to still see you here! 


Tuesday, December 4, 2012

Review: Christian Dior Mini Perfume Set

I've basically left my blog to rot for almost a month... I'm sorry for the lack of updates, but I've been really busy with work, plus I got sick a few days ago. To make it up to you, I have a bunch of stuff lined up for the month of December :)

The first of my comeback posts is about perfumes, something I have yet to discuss here. I am unfortunately a victim of allergic rhinitis and I couldn't tolerate scents very well, my worst enemy being body sprays. Baby cologne and perfumes I could tolerate, but after a week or 2 of continuous usage my rhinitis symptoms would manifest and I couldn't be able to wear any scents for the next month or so. But that doesn't stop me from sampling (and buying) scents that are just too delicious to pass up.

We went to Cebu for a business trip a few weeks ago, and of course I couldn't miss out on visiting the airport Duty Free shop to score beauty goods for less. They didn't have a lot of makeup to choose from at that time so I ended up at the fragrance section, and saw this really cute travel size set from Dior.


Aren't the bottles super pretty and delicate-looking? This set is just perfect if you have olfactory ADD (read: you easily get bored with scents and you have to have different perfumes for day, night, special events, etc). This is also very convenient for those who don't want to lug around full-sized bottles of perfumes when they're on the go. 

This set contains some of Dior's best-selling scents in 5 ml bottles, which are mini replicas of the full-sized ones.

L-R: Miss Dior Cherie, Dolce Vita, J'adore Dior, Hypnotic Poison, Dior Addict

I've sampled the 5, and I like everything except for Dolce Vita (I find it a bit too "mature" for my taste, like something my mom or grandmother would wear lol)

Here are my top 4:

1. J'adore Dior
-has a light scent, great for everyday, lasts 5-6 hours. Currently has a permanent place in my for-work kikay kit

2. Hypnotic Poison
-has a strong vanilla scent, great for evenings out, lasts a lot longer on me than the rest despite it being eau de toilette. I love this one, and I like the bottle made to look like an apple  

3. Dior Addict
-has a sweet, fruity scent; wearable for daytime

4. Miss Dior Cherie
-Of the 5, this just has THE cutest packaging ever. It has a deep, sweet, fruity scent. I prefer this for daytime though because it isn't very long lasting. 

Have you tried any of these perfumes? How did you find it? :)

Thursday, November 8, 2012

The Very Late Halloween Post: Egyptian Princess

Hi girls! This was supposed to be posted a few days before Halloween, but I unfortunately misplaced the flash drive where I saved all the photos from this set :( I'll just have to make do with what I have- which are the photos of the finished look. I'll upload the step by step tutorial once I find the flash drive.

My inspiration for this look is Elizabeth Taylor's version of Cleopatra, which also happens to be one of my favorite movies. Her makeup is gorgeous and super fierce! I love liquid eyeliner, and I love any excuse to just pile it on.. and on.. and on. Hihi. But instead of the usual black, I played around and used a navy blue liner instead. And I liked the way it turned out!
 

 What I used for the eyes: Etude House Proof 10 Eye Primer, Nichido Color Intense Eyeliners in Turquoise, Metal Blue, and Gold, Coastal Scents 88 Shimmer Pallette, ELF Liquid Eyeliner in Navy Blue, Maybelline the Falsies mascara
 
 
The Inspiration:
(source: Google Images)

I also recreated this makeup look for the daughter of one of my colleagues at work :) 
How about you, what was your makeup inspiration last Halloween? 

Thursday, October 25, 2012

Blue and Pink: Barbie-inspired Makeup

Hi girls! Hope you're all enjoying the long weekend. I did this Barbie doll look after a reader sent in her request, and I must say that doing this look was a lot of fun! I got to play with color, contour, and of course, the best part- false lashes and hair extensions! It would have been a lot better if I wore a blonde wig and blue contacts, but I don't have a wig and I can't wear contacts so please settle for my interpretation of a dark haired and dark-eyed Barbie instead :)


What You Need:

  • Full coverage foundation
  • Concealer
  • Eyeshadows (matte pale blue shadow, shimmery pale blue shadow, matte hot pink shadow, pale pink shimmer shadow)
  • Eye primer
  • White eyeliner
  • Highlighter (I used a white cream-based product)
  • Matte contour powder
  • Black mascara
  • False eyelashes
  • Eyebrow powder/gel

1. To achieve Barbie-perfect skin, use full coverage foundation all over the face and cover all imperfections with concealer.

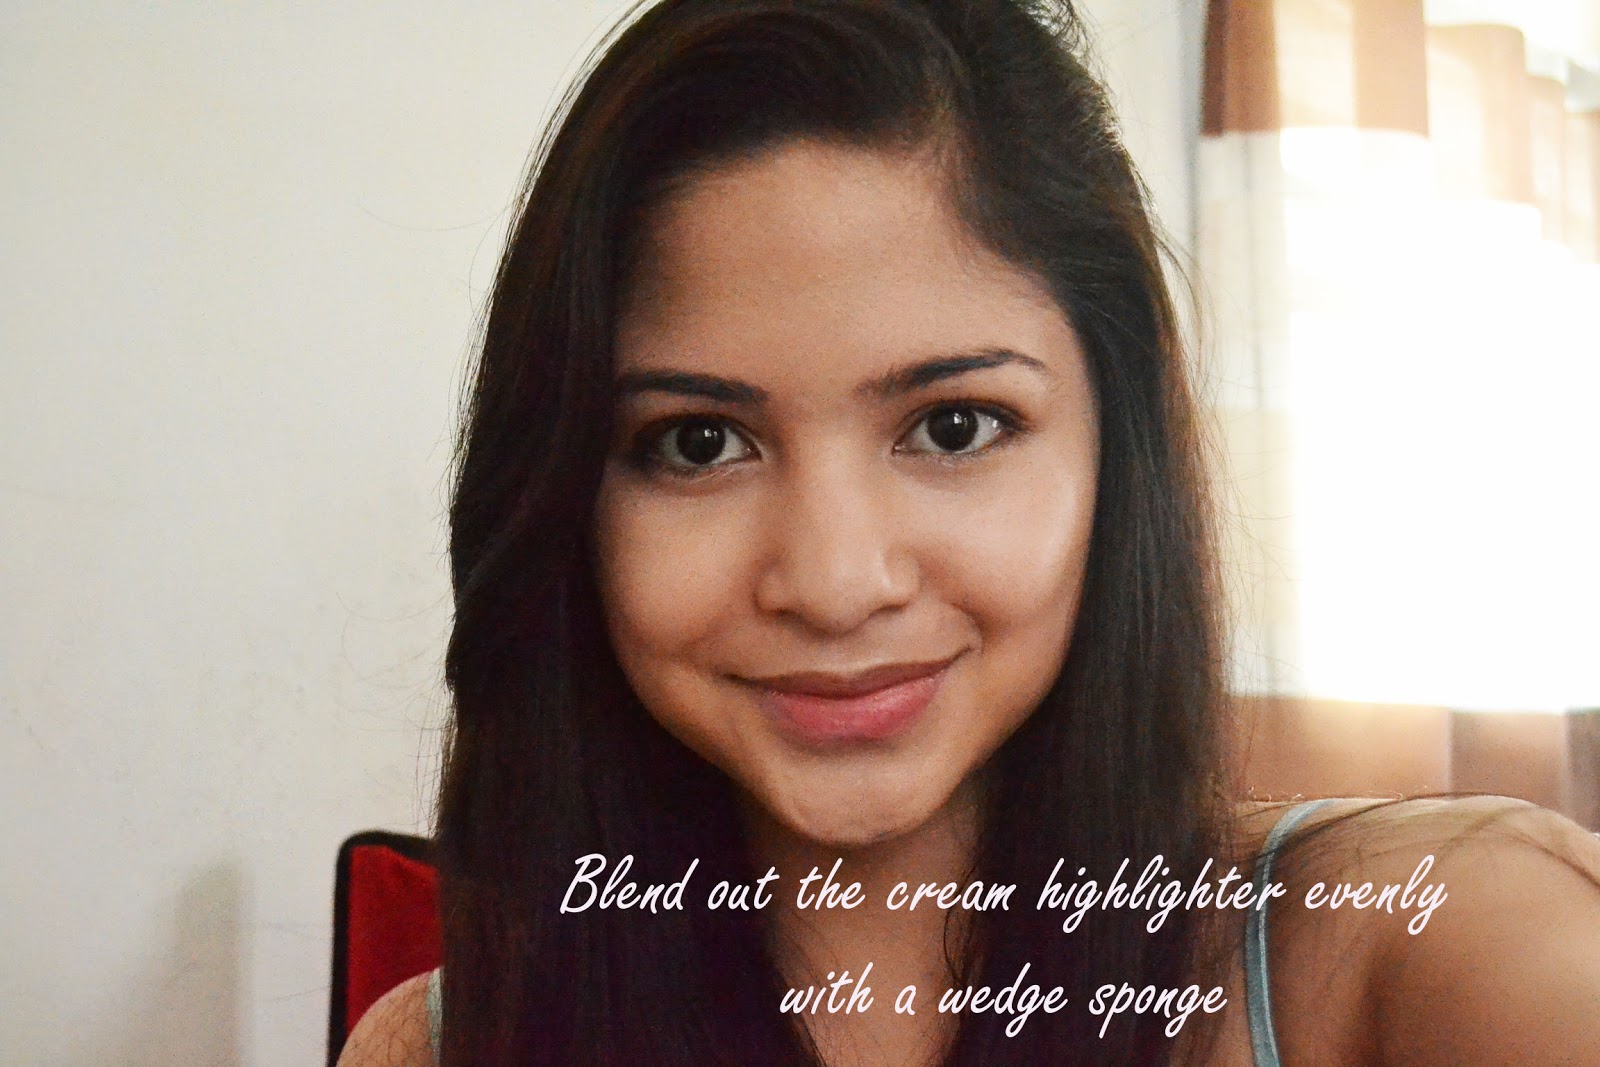
2. Highlight with a cream product. Here's how I did mine:


3. With a matte brown powder, contour your cheekbones, temples, and the sides of the nose to make it look slimmer. Blend everything well to avoid harsh lines.

4. Set with loose powder.

5. Do the eyes:

1. Apply eye primer all over lids
2. Apply the cream highlighter on the browbone
3. Apply matte pale blue shadow on the lids
4. Layer the shimmery pale blue shadow on the lids
1. Apply hot pink eyeshadow on the outer V and on the crease. Using a thin eyeliner brush, apply the same color on the lower lashline as well.
2. Apply the pale pink shimmer shadow on the inner part of the crease. Blend everything well. 
3. To add definition to the eyes, use a brown liquid eyeliner closely on the upper lashline. Don't make the line too thick
4. To make the eyes "pop" and make it look bigger, line your waterline with white eyeliner. Apply shimmery cream product on the tear ducts and inner corner of the eyes as well, then top it off with the pale blue shimmer eyeshadow.


For the finishing touches, fill in your brows, curl lashes and apply mascara, and pop on a thick pair of false eyelashes.

6. But of course, we're not done yet :) With a fluffy blush brush, apply soft pink blush on the apples of your cheeks.

7. Complete the look with a blue-based pink lipstick. I actually couldn't make up my mind at first about what shade I wanted to use for this look (I initially used a lilac pink lipstick) but then I tried it with a vibrant hot pink color and I liked it better. So it's totally up to you what pink suits your fancy :)


Hope you enjoyed this look! Would you wear something like this on a regular day (or probably night)? Or would you save a look like this for a special occasion or Halloween? :)


Saturday, October 13, 2012

Review: Etude House Look at My Lips in Spotlight Beige

I've been wanting a creamy nude lipstick that didn't have too much red/brown/orange undertones, and I spotted this during my last visit to Etude House. I was just supposed to restock on lip tint but I couldn't resist this! It was my idea of THE perfect nude lipstick, beige with just the right amount of orange yellow undertones. It's great for everyday use and it doesn't wash me out (some nudes make me look like a corpse), and it's perfect with smokey eyes.

(Etude House stores, Php 328)
    

The shade is written on the bottom, #10

 arm swatch, without flash


lip swatches

You might like this if...
1. You couldn't get enough of nude lipsticks. This is a great addition to anyone's makeup kit
2. You need a nude lipstick
3. You like cream-finish lipsticks
4. You like formulas that moisturize your lips
5. You don't mind a little shine on the lips
6. You like mildly-scented cosmetics
7. You like products that come in simple packaging
8. You don't mind reapplying after drinking/eating

You might not like this if...
1. You don't like wearing nudes
2. You prefer mattes
3. You like nudes with slightly pinkish or reddish undertones
4. You want you lipstick to be very long-lasting

I really love this and would recommend it to anyone :) How about you, what's your favorite nude lipstick?